|
Select the method for connection setting |
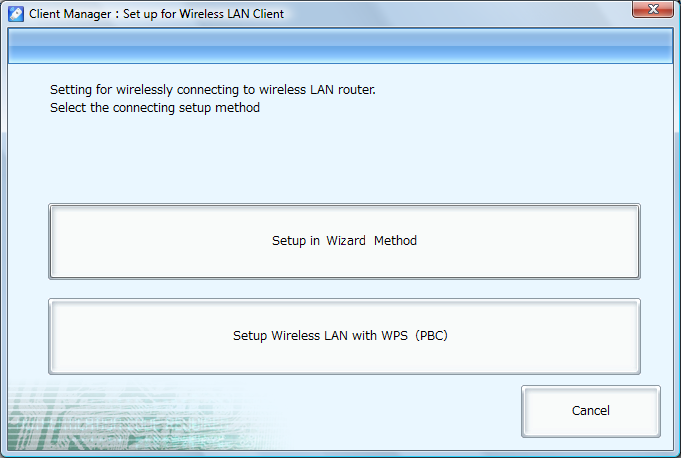
Selecting the connecting method of connection setting |
Select either method
- Setup in wizard method: Select the access point from SSID and connect after setting the security, see the explanation.
- Setup the wireless LAN with WPS (PBC): When you would like to automatically complete the setting with the WPS function supported machines with our wireless LAN router, see the explanation.
|
|
For Windows Vista user
[Setup Wireless LAN with WPS (PBC)] can not be completed in the environment, which XLink Kai driver is installed.
|
 |
 |
[Setup in Wizard Method] |
1. Check the wireless LAN setting
Check the access point setting and take a note about the below items. If you would like to check the wireless LAN setting, refer to the manual for access point. |
| |
Name |
Information set in the customer's wireless broad band router (or wireless access point) |
(A) |
SSID(Connection name) |
|
(B) |
Authentication type |
□Open system □WEP (shared)
□WPA-PSK □WPA2-PSK |
(C) |
Encryption type |
□None
□WEP *If (B) is open system of WEP (shared)
□AES □TKIP *If (B) is WPA-PSK or WPA2-PSK |
(D) |
WEP key or pass phrase
|
*If (C) is not there, not required. If WEP, it is WEP key, and if AES or TKIP, it is pass phrase. |
Checking items for wireless LAN setting
|
| 2. Select access point |
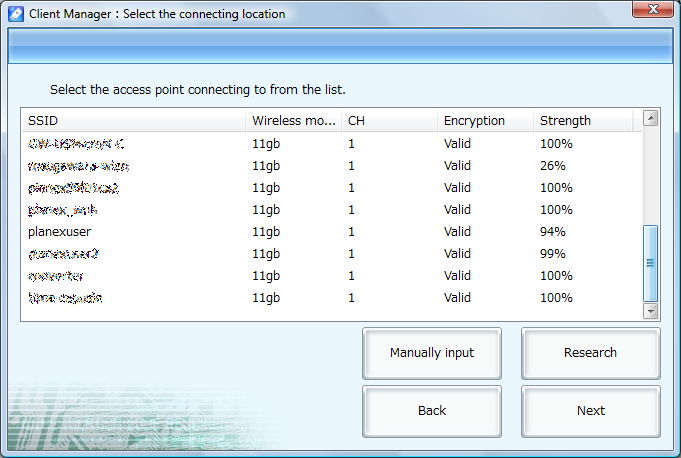
Select the connecting location |
|
Click [Next] after selecting from the list. If access point is not in the list, click [Research] and renew the list.
If the stealth function such as [SSID cover-up function] is activated, it will not be shown in tihe list. Click [Manually input] and enter SSID and select access point.
|
| 3. Security setting |
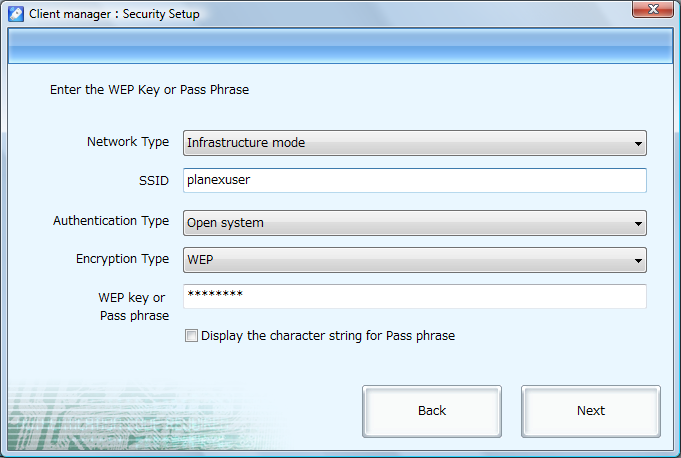
Security setting window |
|
Step1.After entering the information checked in and click [Next]
Step2.If you click [Manually input] in , it is required to enter all the values. If you have selected the access point from the list, enter WEP key or pass phrase only.
* The capture of "Step 3" is [Manually input] window.
|
|
4. Wait until the connection to the set access point is completed.

|
|
Connection window |
|
Wait until the connection to access point is completed.
If the connection is completed correctly, it will move to the window to save the connection location,
Move to step 3[Save the connecting location]
|
|
|
|
Setup the wireless LAN with WPS (PBC) |
| 1. Press <WPS> button in the wireless LAN router, wait until the device is detected. |
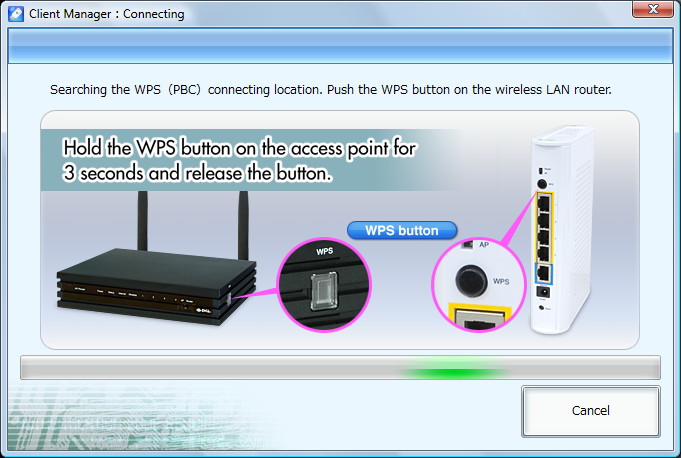
connecting WPS |
If it is detected correctly, it will take you to the window to save the connecting location with SSID acquired with WPS function.
Move to Step 3 [Save the connecting location] |
|
 |
Save the connecting location |
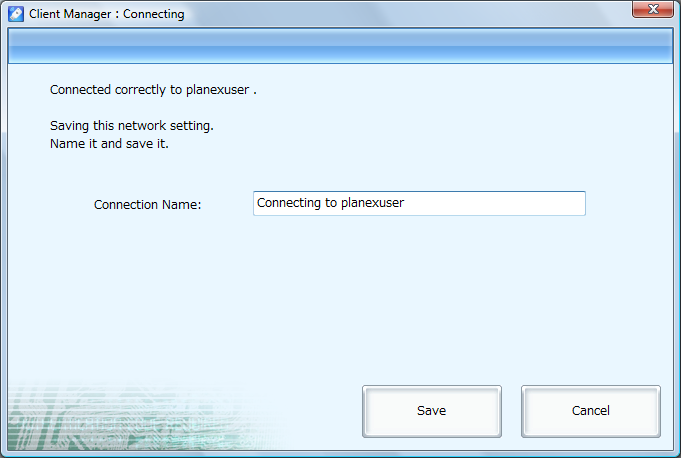
Save the connecting location |
Save the setting for access point correctly connected.
In order for you to recognize easily, determine the connection name.
After entering, click [Save]
|
|
 |
Start client manager |
|
When client manager setting is completed and it is connected to the access point, the icon for client manater will be shown in the notification area of the task bar and client manager remains there.
Task bar notification area
|
|
Double click the icon for client manager or right click and select [Show Wireless LAN Utility], then the window for client manager will be shown and you can check the connection status of wireless LAN.
Status after right clicking the icon of client manager
|
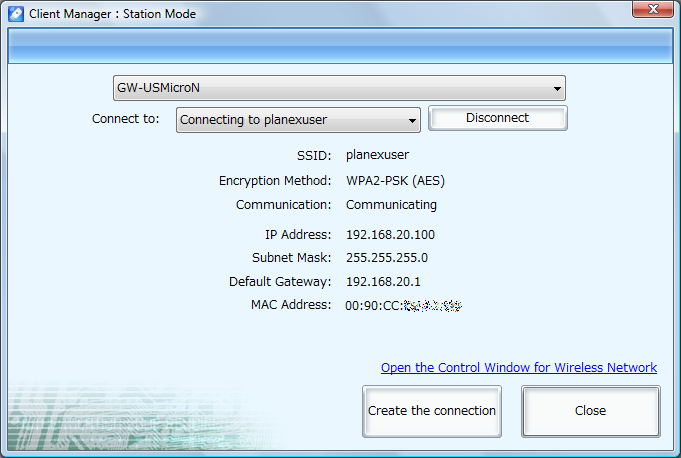
Client manager window (example)
|
|